Portal Shader Breakdown
Intro
This portal/wormhole shader is based on manipulating polar coordinates to create a spiralling effect. It also discards some pixels based on distance and offset by noise for a wobbling circular shape.
I’ve seen some portal shaders use the Twirl node, but I find that using Polar Coordinates produces a nicer swirling inwards effect.
Notes
- This is an Unlit shader applied to a simple flat quad.
- You’ll need a seamless/tileable noise texture in order to create this effect. The exact type of noise doesn’t really matter, play around with a few different noise textures and see which works best. In the texture’s import settings make sure it is also set to Repeat mode.
- The shader created in this post is based off the original one in the tweet above but they do share some differences. I won’t discuss the scrolling star effect in this post so if you want to see how that was done check the original tweet’s graph.
- I have also made some improvements since that last shader to make the graph clearer and more optimised. The previous one used maths based on the Ellipse node to obtain the circular shape, while this one just uses the distance straight from the polar coordinates in order to achieve basically the same effect.
Breakdown
In order to create a portal/wormhole effect we are going to sample a seamless noise texture using Polar Coordinates. If you aren’t familiar with this I wrote a blog post explaining the node which you should read first : Polar Coordinates Post.
By putting the Polar Coordinates node into a Split we can obtain the distance (R) and angle (G) that define the coordinates and manipulate the values before sampling the texture.
In order to have the effect be sucked inwards we need to offset the distance part by time. We’ll create a Time node, take the Time output along with the distance (R) output from the Split and put these into an Add node. The output of this can be put into the X input on a Vector2 node so we can use it as UVs for a Sample Texture 2D node. (As a note, if you see some flickering seams when sampling your texture, turn off Mip Maps for the texture in the Unity editor, or use the Sample Texture 2D LOD node set to 0 instead).
To add a spiralling effect we can now offset the angle. If we offset it by the same value for every pixel though it will just rotate the whole thing rather than creating a spiral. We need to offset it based on the distance, so that points further away are rotated more than points closer to the center. This is as simple as putting both the angle (G) and distance (R) outputs into an Add node. This can then be put into the Y input on that Vector2 node.
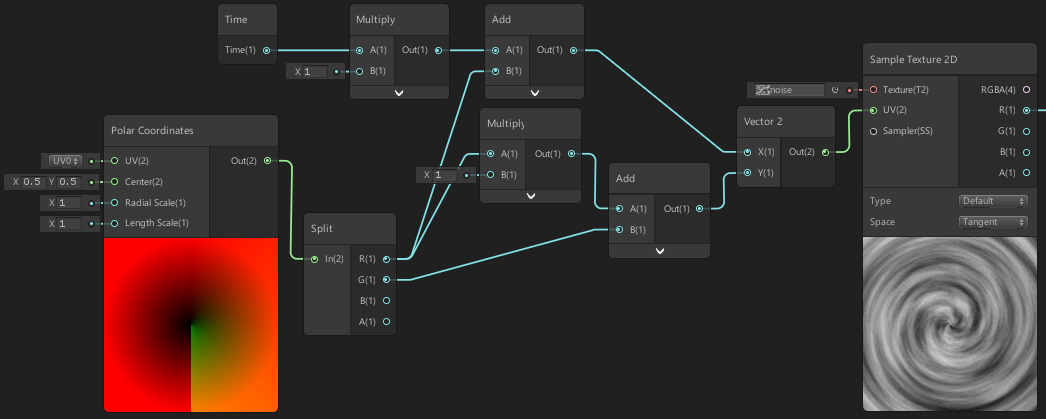
The image above shows what we’ve created so far but I’ve added some Multiply nodes before the Add nodes to change the speed at which it sucks inwards, and scale the amount of spiralling. I’m keeping both of these at 1, but you can adjust these if you want to, or connect some Vector1 properties so you can change these values from outside the shadergraph.
Next we can make the portal round by discarding some pixels. To do this we can again take the distance (R) from our Split and put this into the Edge input of a Step node, with the other input set to 1. This node returns 1 if the In input is greater than or equal to the edge input, otherwise it returns 0. The output of this can be put into the Alpha input on the Master node.
We can then set the AlphaClipThreshold input on the Master node to 0.5, in order to tell the shader to discard pixels that are below that threshold.
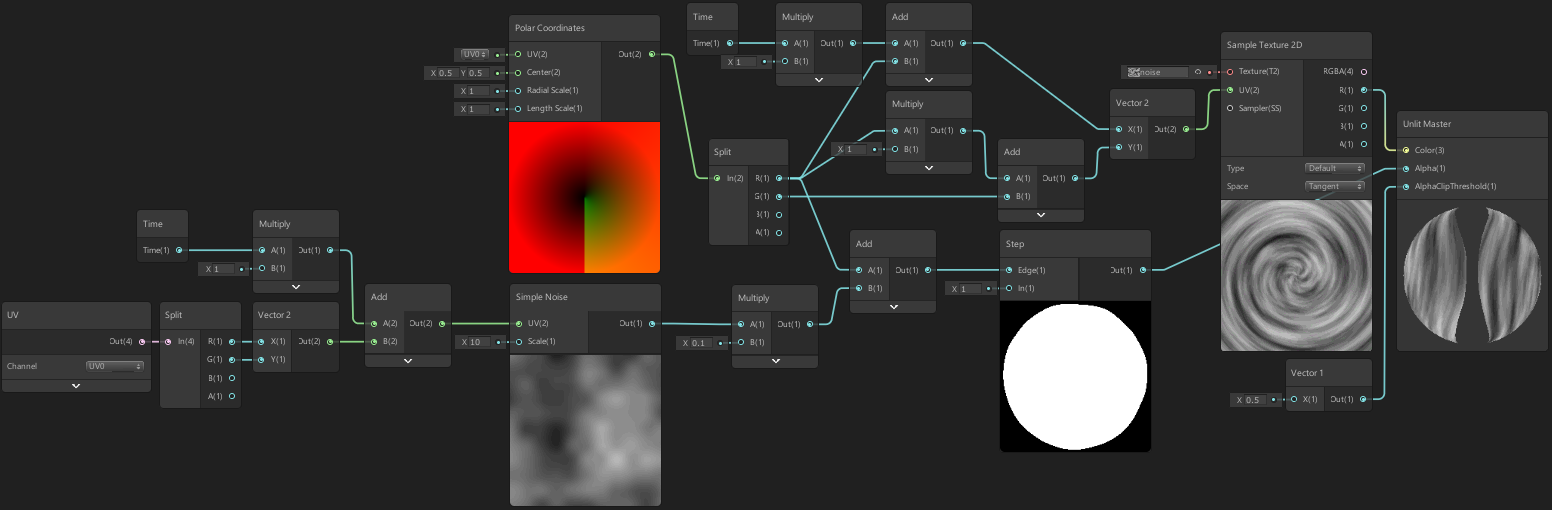
This should now mean our portal is a circle, and you can simply resize the quad the shader/material is applied to if you want a more oval shape. We can also offset the distance (R) value by some noise before putting it into the Step to add a wobbling effect to the portal. To do this we will create one of the noise nodes (Simple Noise or Gradient Noise depending on which type of noise you wish to use, or we could sample a noise texture). As the output of these is roughly between 0 and 1, we should Multiply by a small value so we aren’t offsetting it too much (e.g. 0.1). Then put this into an Add node with the distance and then into the Step node from before.
So we can animate the noise, we’ll create a UV node and Split it, and recombine it into a Vector2 node. This isn’t required but I’d rather work with a Vector2 instead of the Vector4. I’m just going to offset both with the same value, so I’ll use an Add node to add the Time output from a Time node to this Vector2 value we created. This can all be seen in the image above.
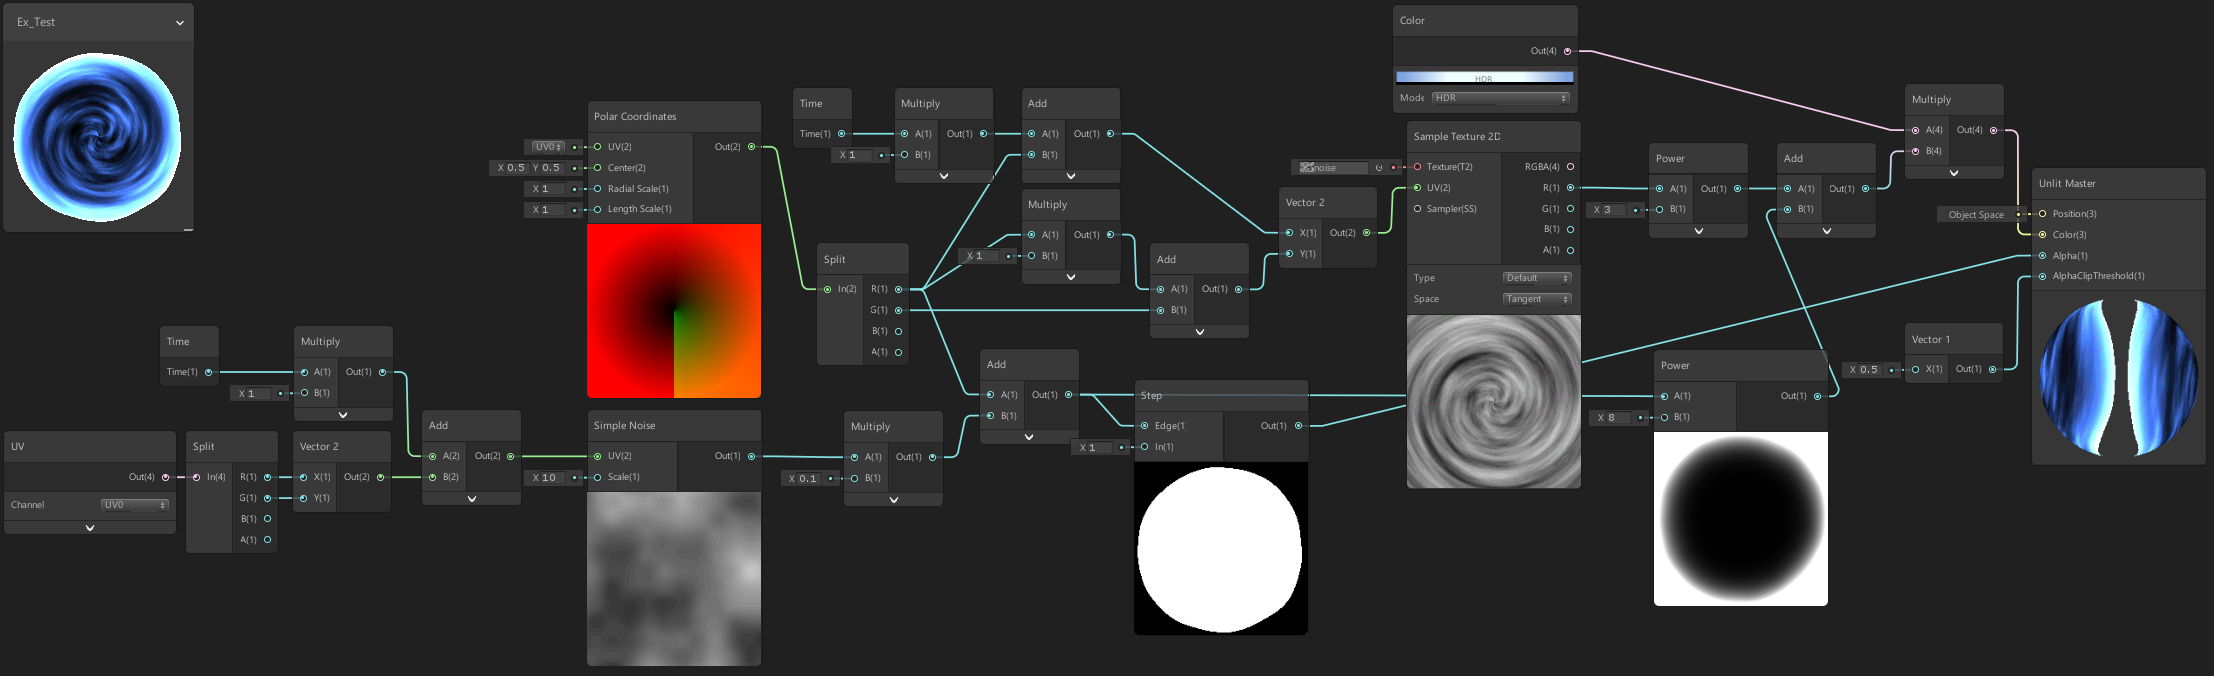
The last thing left to do is give the effect some colour. Create a Color node and Multiply it by the output of the Sample Texture 2D node (when I’m using a grey-scale texture I usually just use the red output. Depending on the compression type I think green can be better though). You can use a combination of maths nodes (such as Power, Add, Multiply), as well as artistic nodes like the Contrast node, to adjust the texture output if required (or just adjust the texture itself in an image editing program to avoid additional calculations).
I’m going to put it into a Power node, with a value of 3. I’m also setting the Color node to use HDR mode and setting the Intensity of the colour to 3 (via the colour picker popup). With a Bloom post processing effect this will cause the portal to glow more but note that bloom can be expensive.
I think that’s a good place to leave this effect. You can play around with different seamless textures to customise how the portal looks. My original shader also had a sort of scrolling parallax stars effect but I’m not going to explain that here. If you are interested in how I did that you can check the original tweet’s graph.
Thanks for reading! 😊
If you find this post helpful, please consider sharing it with others / on socials
Donations are also greatly appreciated! 🙏✨
(Keeps this site free from ads and allows me to focus more on tutorials)